
After I went through my "pine wood" phase in the '90s, I was left with some really beautiful furniture that looked kind of dated. When moving to my new house, I found that I still wanted to use my pine dining table, but the pine matched nothing. Also, along the years, one chair had been damaged beyond repair, so I only had 5 chairs instead of 6. Lastly, this is the table on which my children did their homework when they were young, so there were a LOT of dents and scratches in the surface. Those I didn't want to get rid of completely. <3
You will see a lot of pictures in this tutorial. Some might seem redundant, but I thought you might like to see a lot of detail if you were to try this yourself. I always like lots of pictures. :-)
Soooooo, the first thing you have to do with a stained wood is sand. I used 100-grit sandpaper. On the flat areas, I used a round handheld electric sander; the rest was done by hand.


I removed the center leaf to sand it separately (top). Here's a close-up of the sanded table (bottom).


I decided to use only 4 out of the 5 chairs. I found 2 ladderback cane chairs on CraigsList and sanded them, too. Remember to first unscrew all of the seat bottoms from the chairs. (See them leaning against the wall? You may want to refer to them later. And, yes, that fabric was boring me to tears.)


I also removed the cane from the ladderback chairs in order to re-cover them to match the other chairs in the end.

After all sanding, I used a dilution of TSP to wipe everything down. This removes everything on the surface so the primer sticks well and the finish will last a good long time. I don't recommend skipping this step!


After your primer has dried for a day, your pieces are ready for paint! Do you see how the baker's rack in the background kind of looks old? I wanted the dining set to sort of match that. So the next thing for me is to layer different paints. Start with paints you want to see peek through and work your way up to the color you want it to mostly look like. For me, the first paint is a delicious chocolate brown. I painted everything, including the leaf and the ladderback chairs, even though not shown. Wait a day for this color to dry.


My next color is the color I wanted to be mostly left on top (your main color), so I chose cream. I dry brushed the first coat of cream. Dry brushing is dipping the tip of the brush into the paint, then wiping it off a bit onto a paper towel or rag before painting. It comes out in streaks and sometimes some areas of solid cream. It's just like painting really badly. You can't mess this up. I let that dry a day, then put a second coat of dry brushing cream. If some places seem too thick, just wipe with a rag or with a dry brush.
Somewhere along the way, I decided I liked the chocolate color so much that I would keep a border of it around the table. Take a look.


Time to sand again! But this time the sanding is ART. I used 100-grit and 120-grit. If that's too rough for you, experiment with other grits. You will be sanding along places that tend to wear over time, like the edges, corners, and the places a body would wear it away. You can sand down to the first color (or any amount of colors you layered) or even to wood for visual interest.


Leave in some of the original nicks and scratches. It makes it look interesting.


Sanded on the right only (below).

Sanded bottom of the chair.

When you are happy with the sanding job, make touch-ups to any paint. In my case, this only ended up being the chocolate border on the table top. You could leave this at this stage and start the polyurethane process (see below) to protect your amazing job.
In my case, I like a "tea-stained" look, so I used a light wood stain rubbed on with a rag over all pieces. In fact, I put two coats (waiting a day in between) of stain to darken the cream color and make it look older. This goes very quickly. Again, it's not necessary to do this "well," as it's supposed to look old and streaky.
First layer of stain on left in the picture.


One coat of stain over everything.


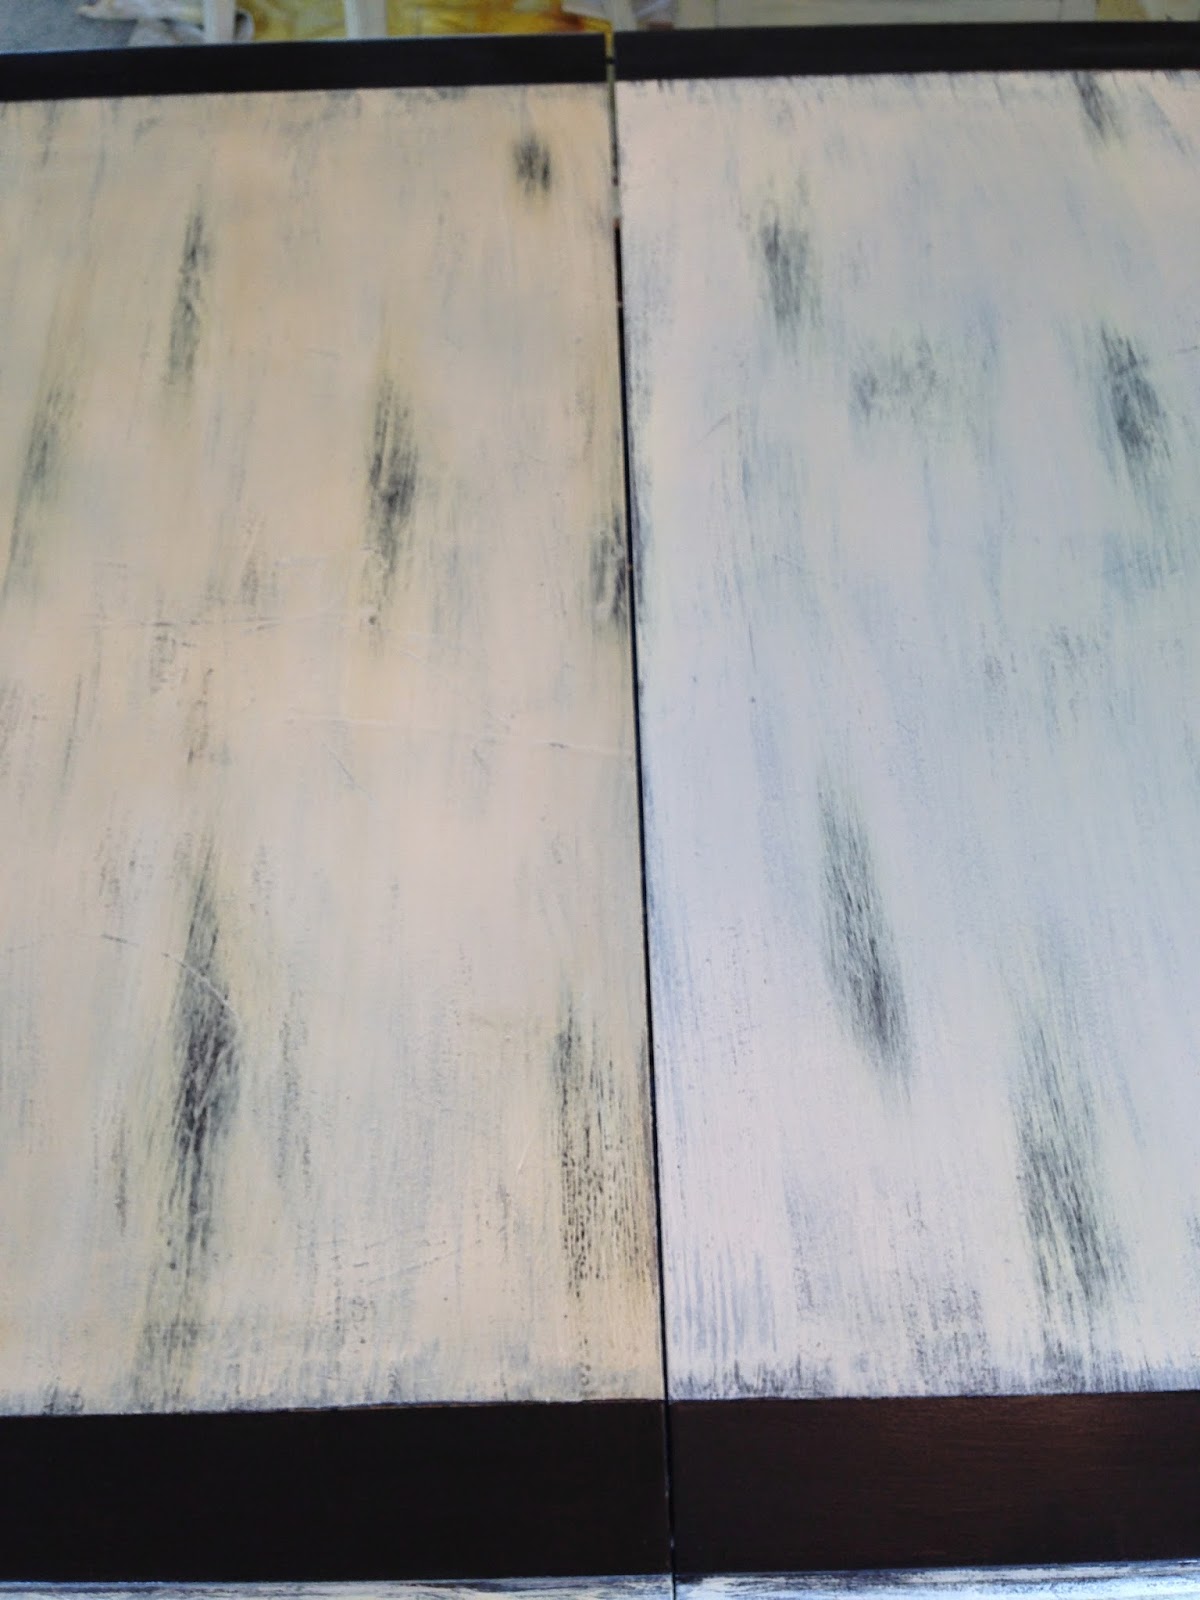
One coat of stain on the left and two coats on the right in the picture.

You don't have to use the stain process - I just go crazy for how it mellows any color. You're almost done! Next...
DO NOT SKIP THIS STEP: After the stain dries, put on at least two coats of polyurethane (drying between each coat). The polyurethane will protect all of your hard work. You don't want the paint to come off during a dinner party! I use a polyurethane that actually has another very light stain in it, but you can always use clear. I find it goes on better with a foam brush - it seems to create a bunch of bubbles if I use a regular brush.
And the last thing to do: Let all of those layers of paint, stain, and polyurethane cure for a week. It may seem dry, but it needs to cure through all of the layers.
Buuuuuut, the fun thing to do while waiting for the pieces to cure is RE-COVER THOSE OLD CUSHIONS!
You have already removed the cushions (see pictures way towards the top). Simply pull off the fabric with staple pullers, a screwdriver, or wrench, as it will be staple-gunned to the bottom of the seat. In my case, even my husband couldn't get the staples out of the bottom of the seats, so I just cut the material off as close to the staples as possible.
I saved the foam piece on the matching chairs and plywood seat. Since the cane was removed from the ladderbacks, my husband made a piece of plywood using the cane seat as a template and I bought new heavy duty foam for these two seats.
Find a new vibrant material that makes you happy, cut out squares to cover each seat, and then staple gun the new fabric to the underneath of the seat. Staple a couple of staples to one side evenly, then do the same to the opposite side. Do the same to the other two facing sides, one at a time. Then put in rows of staples along the sides. Fold the corners however you like them, kind of like wrapping a package. There are many ways to to this, so just make it pleasing to you. Cut off excess.
You may choose to put a square of felt covering the bottom of the seat and hiding the staples, but I can never figure out why this step is necessary. If someone is lying under my chairs making comments about the staples, I've got bigger problems! LOL
Screw your seats back onto your chairs.

Here are two of the chairs completely finished.

Ta da! From an old nicked- and scratched-up pine dining set with one chair missing, I have a new dining set that I can be proud of. You can see I left the ladderbacks solid chocolate to match the border of the table, but covered the seats to all match.


I quite like the way this project turned out - and I promise you that it's not difficult at all! You can't mess it up because it's supposed to look old and lived-in. If you have any questions, just let me know! I hope you enjoy your own project and send me a picture!!
Danette


